


Before I made my first loaf of sourdough, I remember being intimidated. Intimidated by the amount of time it takes to make it, the fact that you need to have a starter of some kind, and the general supposed fussiness surrounding the whole project. I had been told so many times that sourdough is hard to make. In a way, yes, artisan sourdough, the best of the best, takes a lot of time, patience and skill. But, if you want to make yummy, simple sourdough for your friends and family, it really isn't as hard as it seems.
Want to learn how to make two sourdough loaves in one day? Here's how I do it!
This recipe is not my own, and it is not necessarily the "right" way to make sourdough. It works for me, so I use it when I want to make bread in a day.
If you want more information on skills like stretching and folding (rather than kneading), autolyse, or other traditional sourdough preparation methods, I am likely going to make a series of other posts where I try out these slower tactics for making a more perfect loaf. This recipe (with my own tweaks) comes from I Love Cooking Ireland and has been one of my go-to recipes, since it is so easy and quick to make! The result is delicious and beautiful.
Helpful Links to Get You Started
Ok, let's get at it!
(Scroll to bottom of the page for a short, itemized recipe)
 First, make sure your starter has some nice, big bubbles on the sides and top. It is best to use starter that was fed within the last 6-10 hours. You know your starter, so whatever time frame works for you to catch it right at the top of its rise is the best time. I've used my starter for this in many different stages of rise, so it's not a huge deal if you fed it 5 hours ago and it's still on the up. My recommendation is to feed it the night before, then start your bread right away in the morning.
If you need to make a starter, never fear! I like this step-by-step from The Clever Carrot. Come on back in a week or so once you've got a lovely, bubbly starter of your own! And don't forget to give it a name, since it's basically a new pet.
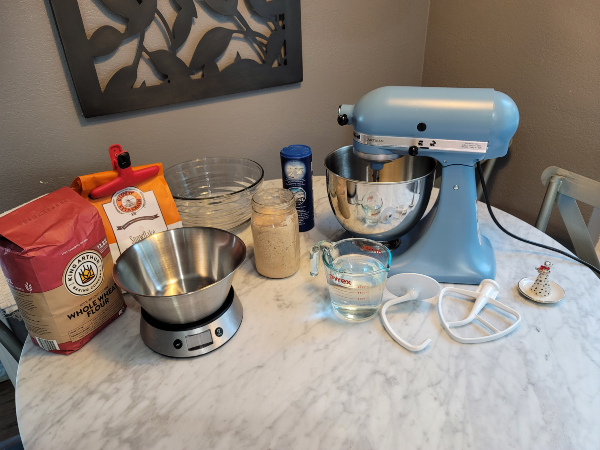
Measure out with your scale 800g of flour (the recipe from ILCI says strong white flour, but for this I am using about 500g of whole wheat King Arthur flour and 300g of Giusto's Snowflake Flour, which is an unbleached white flour that is made by a local miller). Put the flour into a large bowl.
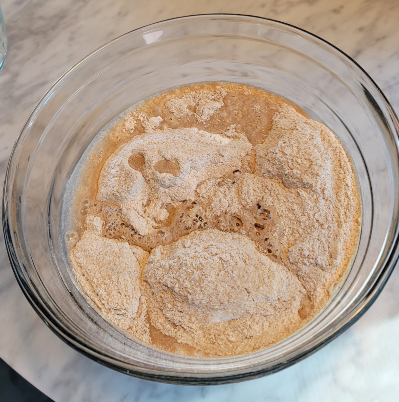 Measure out 460ml of room-temperature water. Add this to the flour in the bowl, and stir together. I like to combine the flour and water first and stir together to give it a chance to combine. It's like a mini autolyse.
Then, add about 10g of salt. I usually go for about 12g, since my family likes the sourdough to be more flavorful and salty. Stir everything together.
Now it's time to add your starter. Measure 320g of starter and add to your mixture. It should start to come together as a shaggy dough ball.
At this point, you can either transfer to a stand mixer or knead by hand.
When I first made this recipe, I didn't have a mixer. It is not a requirement in any way and honestly I usually will bring the dough out of the mixer at a certain point to finish kneading by hand. Bread-making is such a hands-on process that it is hard to know exactly when it's ready to rise when using a stand mixer alone (in my opinion).
Now it's time to knead, mix, and stretch that dough!
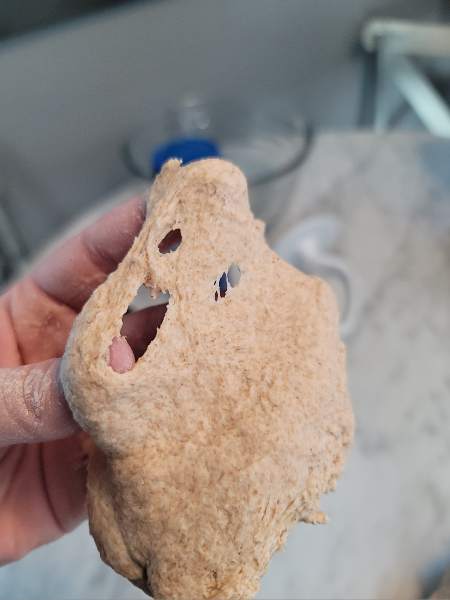
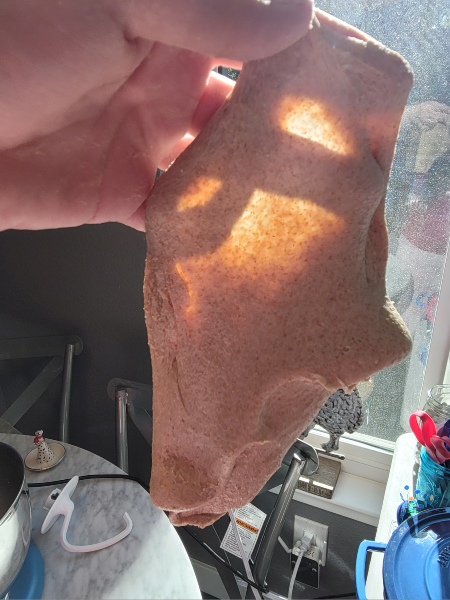 You will notice a moment where it goes from being a shaggy, sticky ball to being smooth and pliable. It will seem to want to stick together. At that point, you can cut off a piece using your bread rib (link above) and hold it up. As the dough falls, it will either tear apart or, if it is ready, it will create a windowpane-like membrane. If the dough holds together and you can see light through it, you know that your gluten is strong and holding together. That means it's time to let the bread rise. If it is still tearing, knead for a little longer. I promise the bread will tell you when it is ready!
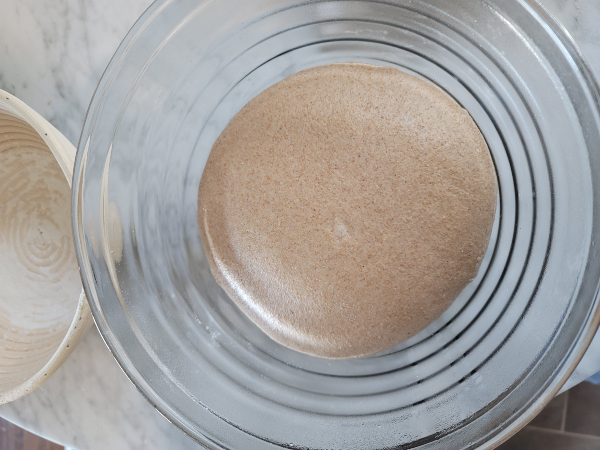
Bring your bread back together and transfer to a large bowl. Let it sit on the counter, covered, for about 3 hours.
Some breads require proving in the oven with the light on but I do not recommend that with sourdough. It does really well at room temperature, as the starter eats the flour you've basically fed to it. Commercial and package yeasts like and can handle heat, but high heat is the enemy of sourdough starter. For that reason I also advise you not leave the bread to rise in a sunny place.
Now you can get on with your day for a few hours! Let it sit and do its thing.
 3 hours have passed, remove your bread from the bowl. Flatten it slightly to "knock it back", and start stretching the corners over each other to create a ball. Do this by feel-- you're really just trying to quickly and gently knock some air out of it, and then re-form it into a nice, round shape.
Now you can split your bread into two even sections and start to shape your loaves!
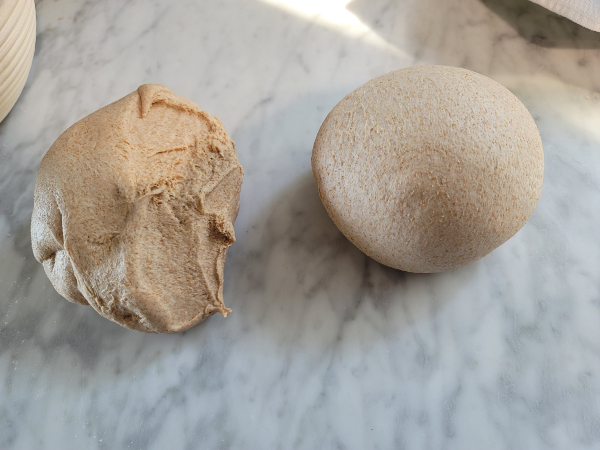 Cut your bread into two even sections and shape them one at a time. While shaping, you want to create surface tension on the sides of your loaf. The easiest way to shape is to pull one corner at a time into the center of your ball of dough to create a round shape. Then, put one hand on the top of the dough ball and one on the side, with your fingertips touching. Drag the dough backwards one time. Then, flip it 45 degrees and drag again.
Once you're done shaping, you can put your loaves into a floured bread banneton (link above) or a floured, towel-lined Pyrex dish. Then, you guessed it, it's time to let that bread rise again.
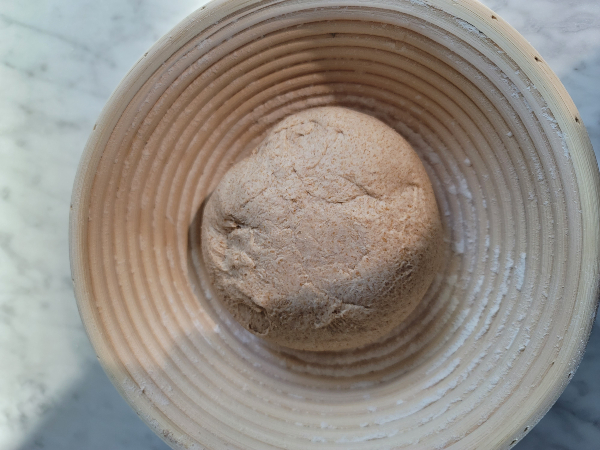 Cover your breads with a towel (if you're using a towel-lined Pyrex dish, you can just wrap the towel around the top of the bread) and let them sit for another 3-4 hours. You can, at this point, put them in the fridge to rise overnight if it's getting late. I personally prefer not to do this since I feel like I have less control over the speed of the rise, but if you are in a time crunch, it will rise just fine in the fridge.
After 3 hours, check on your breads. My tried and true way to know if they're ready is to poke them very gently with my middle finger. If they bounce back, they are ready. If not, let prove for another 30 minutes to an hour.
Put your dutch ovens into the oven. Preheat, with the ovens inside, to 460°F. I like to have my dutch ovens already warm before I put the bread in. If you don't have a dutch oven, you can use a casserole dish with a lid. It is important to have a lid, because the bread needs to steam while it's in the oven in order to rise well.
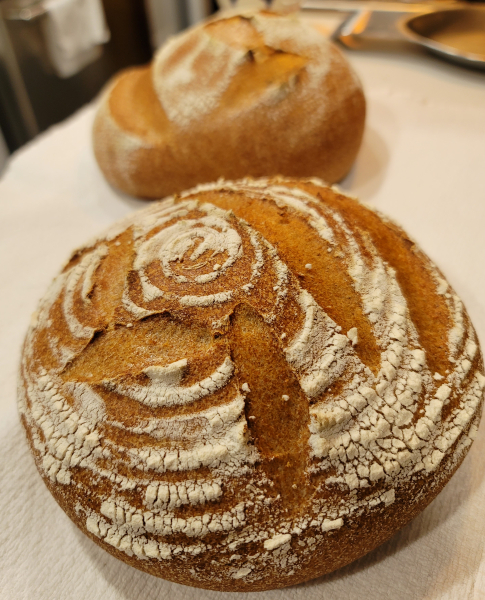
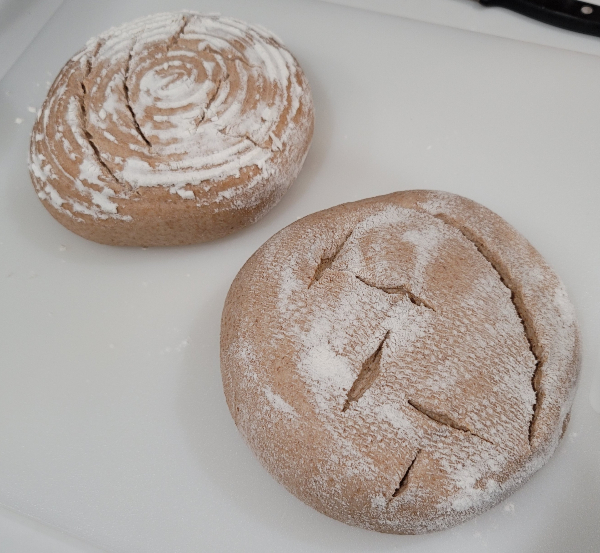 Flip your breads gently out of the basket or Pyrex dish onto a tray or cutting board. Now it's time to score your loaves! This is your time to be creative. Using a bread scoring blade (link above) or just a very sharp paring knife, cut into the top a design or simple cut. This lets the air escape the bread and helps with the rising in the oven.
Transfer your breads to your warmed dutch ovens. They do not have to be the full 460°F of the oven, but having them warmed gives a head start to the rising process. Cover with the lids and put in the oven for 25 minutes.
After 25 minutes, take the lids off and bake for another 25 minutes. The first 25 are for the bread to steam and rise, and the next 25 are for the bread to get nice and crispy.
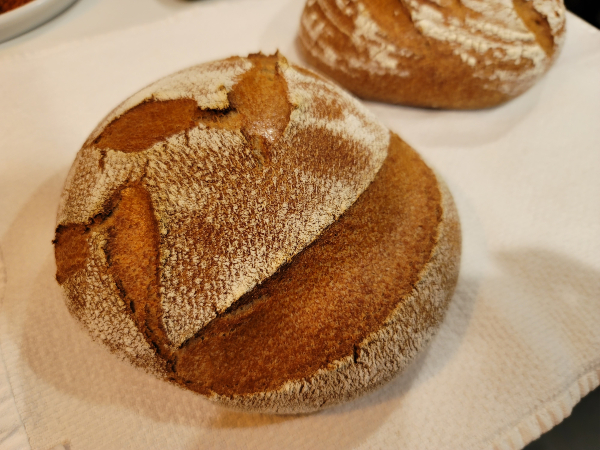 Remove your breads and let them rest for a while. But, let's be real, I usually wait all of 10-15 minutes, just as long as it takes to not burn my hands handling them. Slice and serve!
How did your loaves turn out? Let me know via email, Instagram, or Facebook. Happy baking!
Recipe adapted from I Love Cooking Ireland:
1. 500g whole wheat flour, 300g unbleached white flour (or 800g flour of choice)
2. 10-12g salt
2. 10-12g salt
3. 460ml water
4. 320g sourdough starter
5. Add the flour and water to a large bowl and stir together to combine. Mix the salt throughout. Add the sourdough starter.
6. Combine all the ingredients together to form a shaggy dough. Note: Do not add any extra flour, even when kneading! The dough is meant to be wet and sticky.
7. Transfer the dough to a stand mixer or the counter and knead until the dough can stretch without ripping (the "windowpane" effect).
8. Let the dough rise in a bowl for 3 hours at room temperature. Avoid sunny or overly warm areas.
9. Lightly punch the dough to knock out air and equilize the temperature within the bread. Bring back into a ball and cut into two equal loaves.
10. Shape your loaves and transfer to a floured bread basket or floured, towel-lined Pyrex dish.
11. Let rise for 4 more hours.
12. Preheat oven to 460°F with dutch ovens inside.
13. Turn out dough onto a baking sheet or cutting board. Score the top using a sharp blade.
14. Transfer scored loaves to warmed dutch ovens. Put the lids on and bake for 25 minutes.
15. Remove the lids and bake for another 25 minutes, to brown the top.
16. Remove bread when it is crispy and golden-brown.
Enjoy!

 Want to join the flock?