


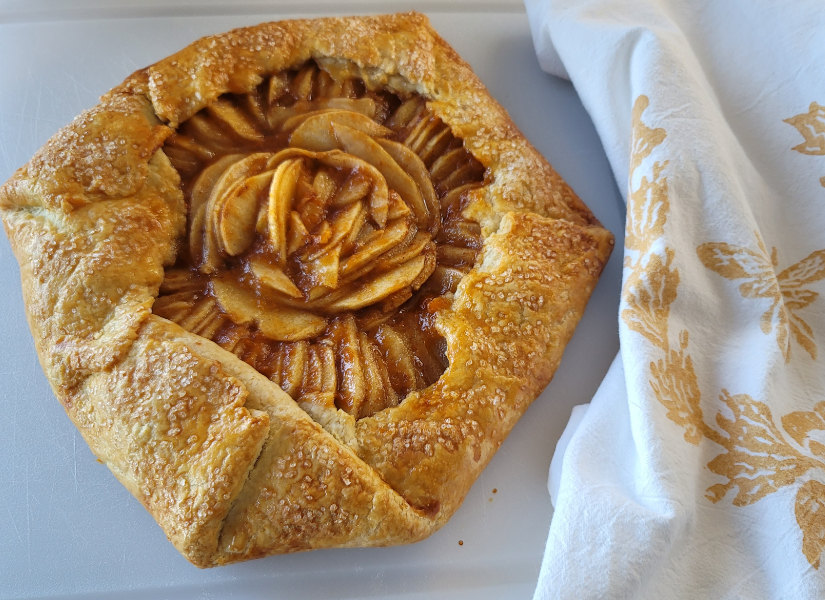
If you have never made a galette before, I highly recommend it. A galette is basically a free-form pie, without all the fuss of preventing a soggy bottom or making it look fancy. The design of a galette makes it look finished in a natural and rustic sort of way, with the edges tucked over into a rough, hexagonal shape. If I am feeling like pie but I’m not in the mood to get fussy about decoration, this is my go-to recipe..
 The galette I made this weekend was a mix of apples and pears. I used 2 apples and 2 pears for the galette pictured here—if you have fewer fruits available, a galette is a great choice too, because it typically calls for less filling than a pie (being that it’s flat and you don’t need to really “fill” it in the same way).
Also, you can throw pretty much anything into a galette. Only have raspberries and blueberries around? Throw it in a galette! Want to make a quick and easy pizza? Put some tomatoes, pepperoni, and cheese into a galette and it’ll be done way faster than a traditional pizza. The possibilities are truly endless.
Ok, let's get at it!
(Scroll to bottom of the page for a short, itemized recipe)
Making the pie crust: The first thing that you will need to do is make the pie crust. I always make my crust under the guidance of Erin Jeanne McDowell’s method. I like to make pie crust with my hands. For a sweet galette, I like to add in cinnamon and sugar along with the usual amount of salt.
First, measure out 1 and 1/2 cups of all-purpose flour. Add into it 1 tsp of salt, 2 tbs of sugar, and 1 tbs cinnamon.
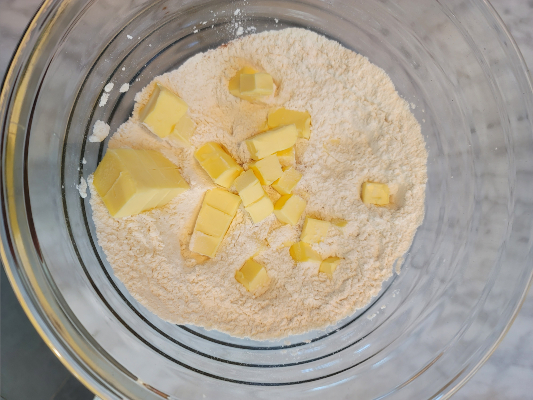 Add to the flour 1 and 1/2 cups [12 tbs] of unsalted butter, cut into roughly 1 inch cubes. I like to use Kerry Gold Irish Butter because it has a high fat content and makes the crust super flaky and buttery, but any unsalted butter will work fine.
Get your hands in there and toss the butter until it is fully coated in flour. Then, start to shingle the butter by squishing it between your fingertips until it is flat. Continue to do so until all pieces have been shingled and split up, and are fully coated with flour.
Try not to squish the butter using your whole hand, as the palm of your hand holds a lot of heat and can melt the butter prematurely. We want to keep the dough as cold as possible so that the butter does not melt until it hits the oven.
 Then, make a well in the center of your butter and flour mixture and pour in about 1/4 cup ice water (only water, do not pour in any ice cubes). Toss and squish to fully integrate the water into the dough. If you need a little more ice water, add bit by bit. The dough will be rough but not wet when it is ready.
Pour it out onto the table and bring together roughly, trying not to warm it up too much.
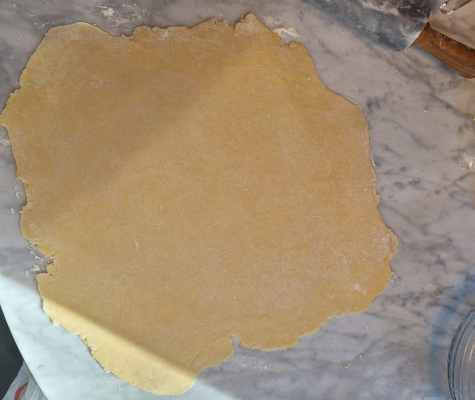 Form it into a disc, then you can refrigerate if the dough is getting too warm. If it is not, then you can flour your work surface and roll it out into a round, 8-10 inch circle.
Lift, move, and flour the dough as you roll so it doesn’t get full of holes or start to melt.
Then, move your rolled-out dough onto a piece of parchment paper, move the parchment paper onto a baking sheet, and refrigerate while you start the filling.
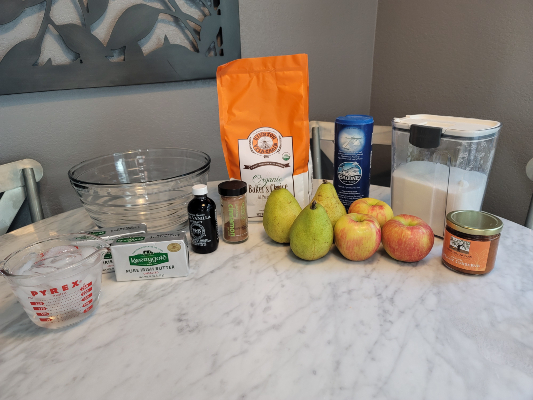
Making the filling: Now, you can start the filling! Peel and core your apples and pears. Cut them into 1/4-1/2 wide slices and put them into a bowl.
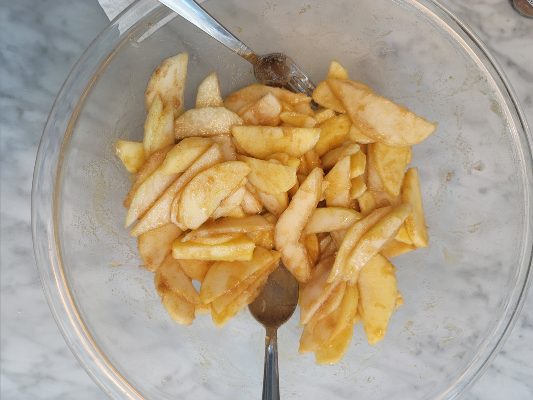 Add to the bowl: 1/3 cup sugar, 1 tbs cinnamon, 2 tbs melted butter, 1 tsp vanilla extract, and 1/8 tsp salt.
Mix it up! Use two spoons and toss the fruits together to fully coat them.
Preheat your oven to 350 degrees F.
Assembling the galette: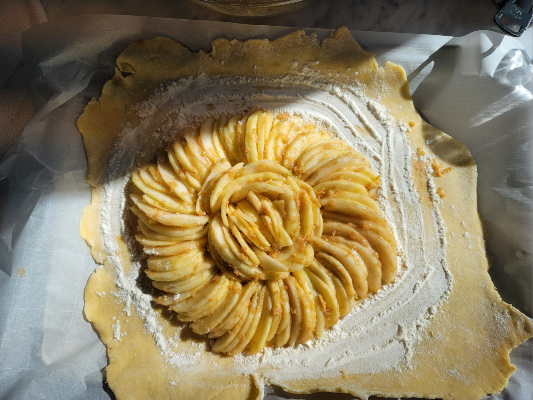 Bring your disc of dough out of the fridge and dust with a layer of flour. Take your fruit slices and arrange them in concentric circles, leaving about 2-4 inches of space on the sides because you will need to fold the dough over itself. I like to make a circle on the outside, then create a little flower or rose shape in the center.
Fold the dough over the sides, creating little corners at each place where the dough overlaps itself.
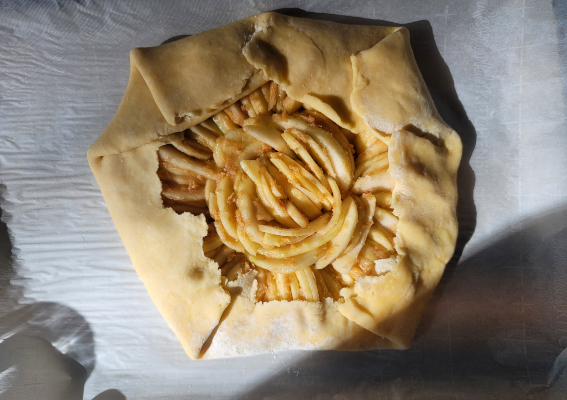

Can you see your galette taking shape? So pretty!
Take one egg and brush it over the crust of the galette. Get some large-grain sugar sprinkles and sprinkle them over the crust. If your oven is still heating, put it back in the fridge to cool before you pop it in.
Once the oven is ready, it can bake for 55-65 minutes (once it becomes golden-brown and you can see bubbles in the filling).
You can add some warmed jam to the filling (as a glaze) to add an extra kick of flavor, or eat it as-is.
Enjoy!
Recipe adapted from Once Upon A Chef:
For the crust:
1.5 cups flour
1.5 cups unsalted butter
1 tsp salt
2 tbs sugar
1 tbs cinnamon
For the filling:
2 large honey crisp apples
2 large pears
1/3 cup sugar
1 tbs cinnamon
2 tbs melted butter
1 tsp vanilla extract
1/8 tsp salt
Baking specifications:
350 degrees F for 55-65 minutes
Add warmed jam glaze to the filling before serving (optional)
Happy Baking!

 Want to join the flock?